This project is sponsored by The Home Depot. All ideas and opinions are my own.
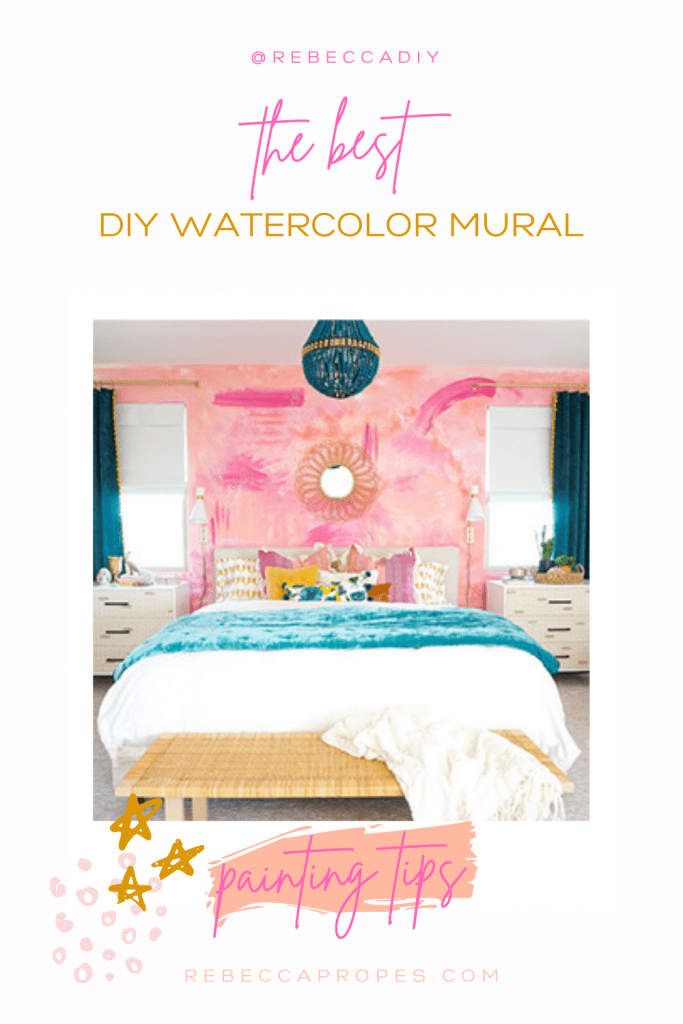
Have you heard? My design bestie, Jo, from Oh So Jo, and I started a youtube channel together because we both share a love of DIY projects, design and of course color so it’s no surprise we were thrilled to team up with The Home Depot to add some color to my master bedroom using paint and add an Abstract DIY Painted Wall Mural!
The Plan | Abstract Painted Wall
The master bedroom is one of the last spaces in so many homes, yet such an important space. It’s the place where you begin and end your day and it should be a space that you love and can relax in. We moved into our home a little over a year ago and I promised myself that this was going to be the first room I took on as a project but seeing that it was the last room people see in my home, it took a backseat to other projects.
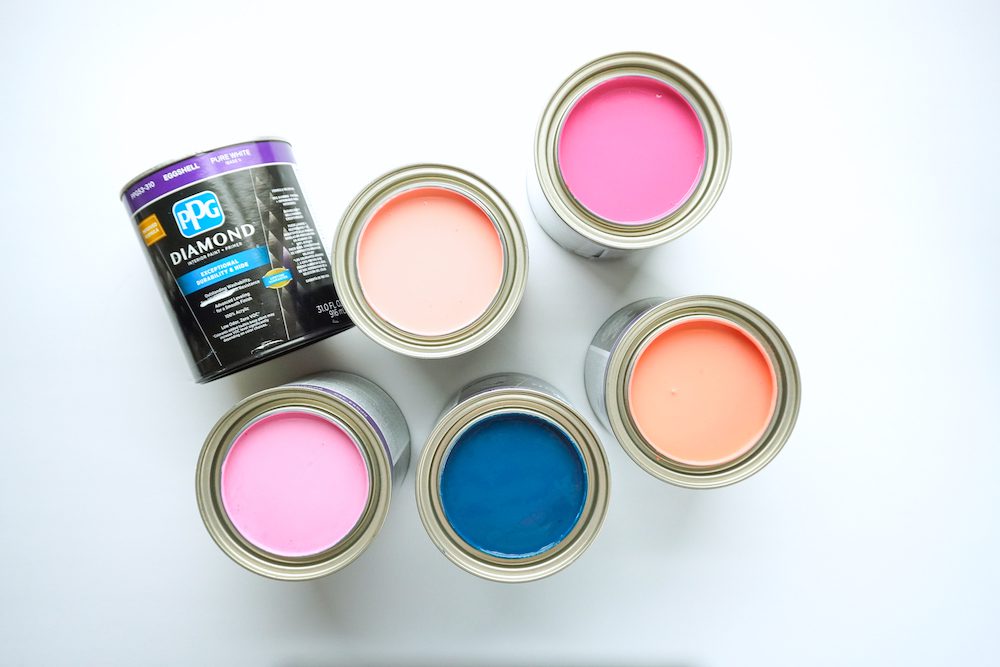
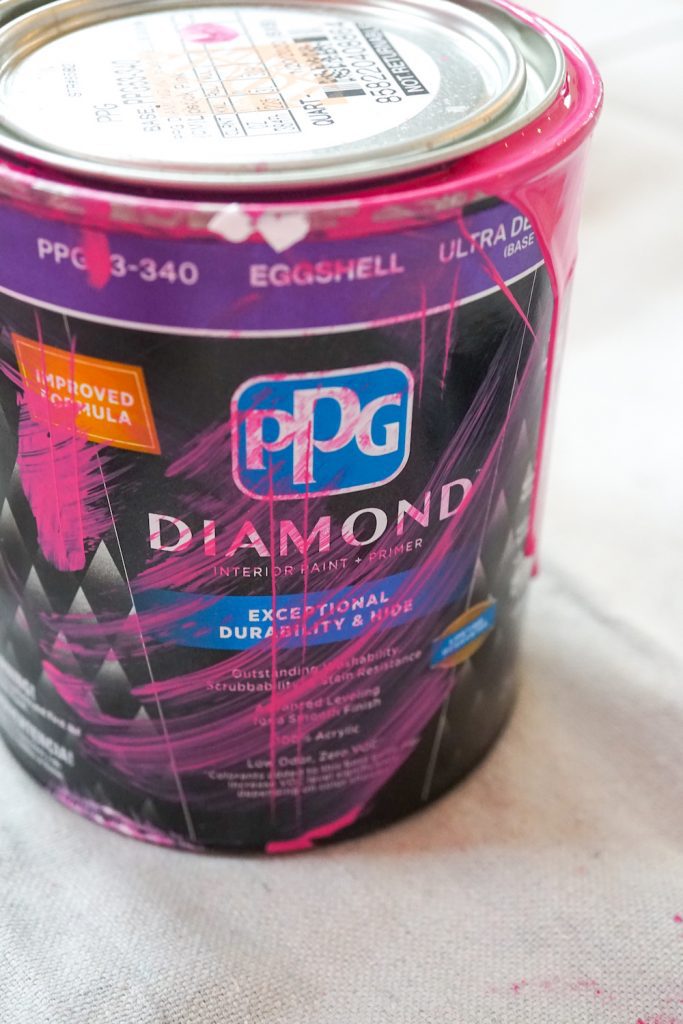
Well, I was finally tired of looking at white walls, albeit pretty, not really what I wanted. I LOVE color and I really wanted to make the wall behind my bed a focal point. I purchased some bedding a while back and fell in love with the colors in it. So, using the pillow shams as color inspiration and with the help of the ProjectColor™ app we headed to The Home Depot to grab our paint. We hand picked some colors and then using The Home Depot ProjectColor™ app…we ended up with the following colors from Behr that we had custom matched in the PPG Diamond Interior Paint.
Here are just a few side tips to remember when color matching:
Make sure the base paint is the exact same | sheen, tintable base and tier of paint. If you decide to have a color custom matched, save the color code/formula so you if you need more paint, then the consistency will be the same instead of trying to match from a color swatch. In this case, we matched from the color swatches and now we have the color formula saved to mix in the paint brand and finish that we wanted.
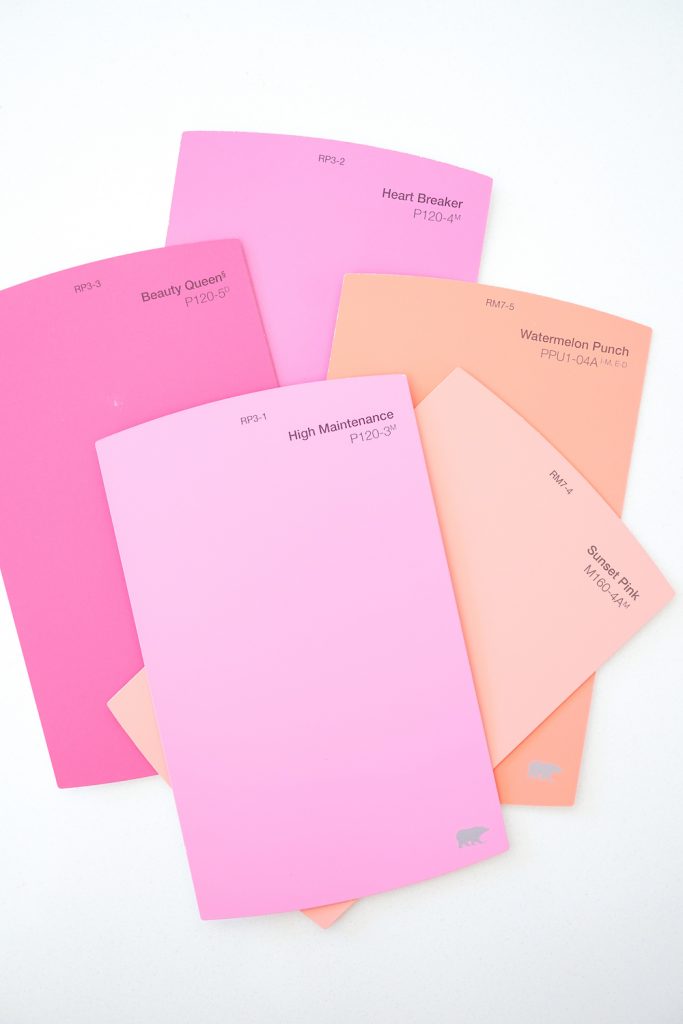
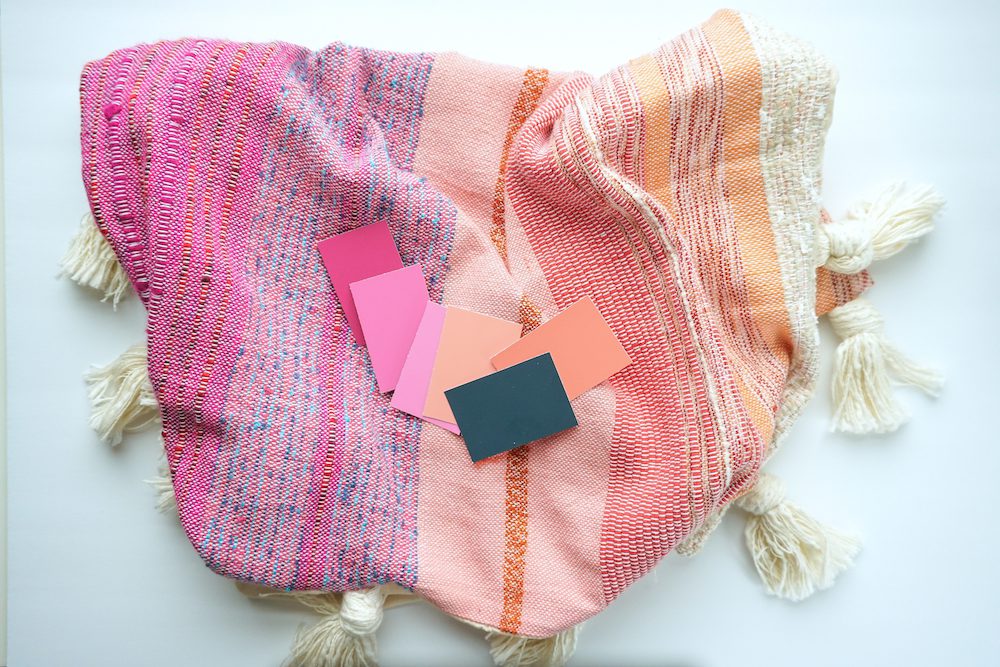
Initially we were going to incorporate a darker blue, but we decided to keep it to 5 colors to create the abstract painted wall mural. We opted for PPG Diamond Interior Paint in an eggshell finish. This paint is AMAZING!!!! It is a zero VOC, 100% latex paint with almost no odor. It’s a paint & primer in one and the coverage was excellent.
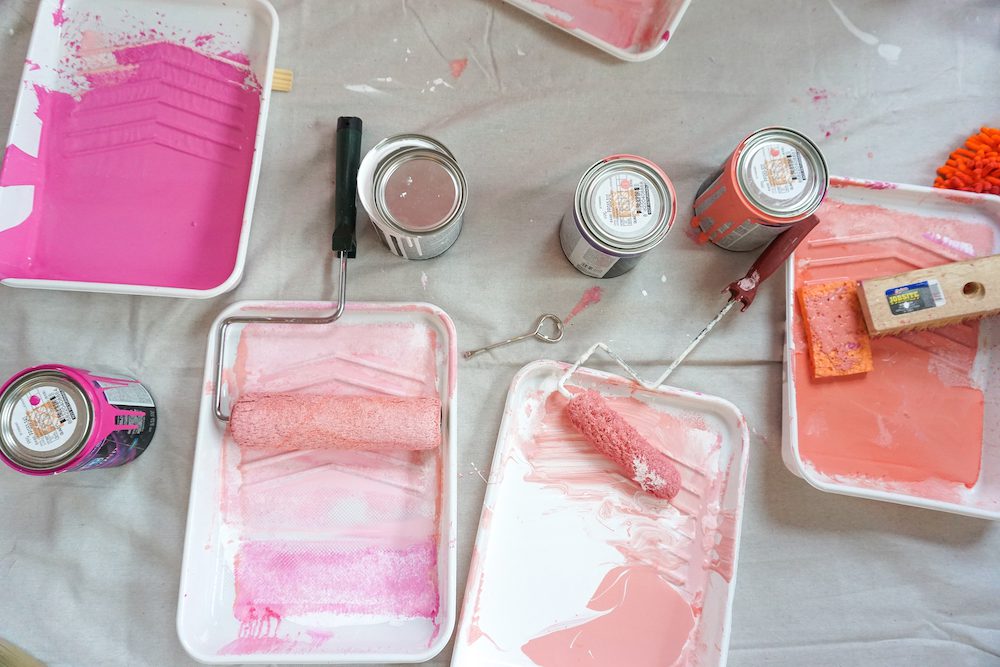
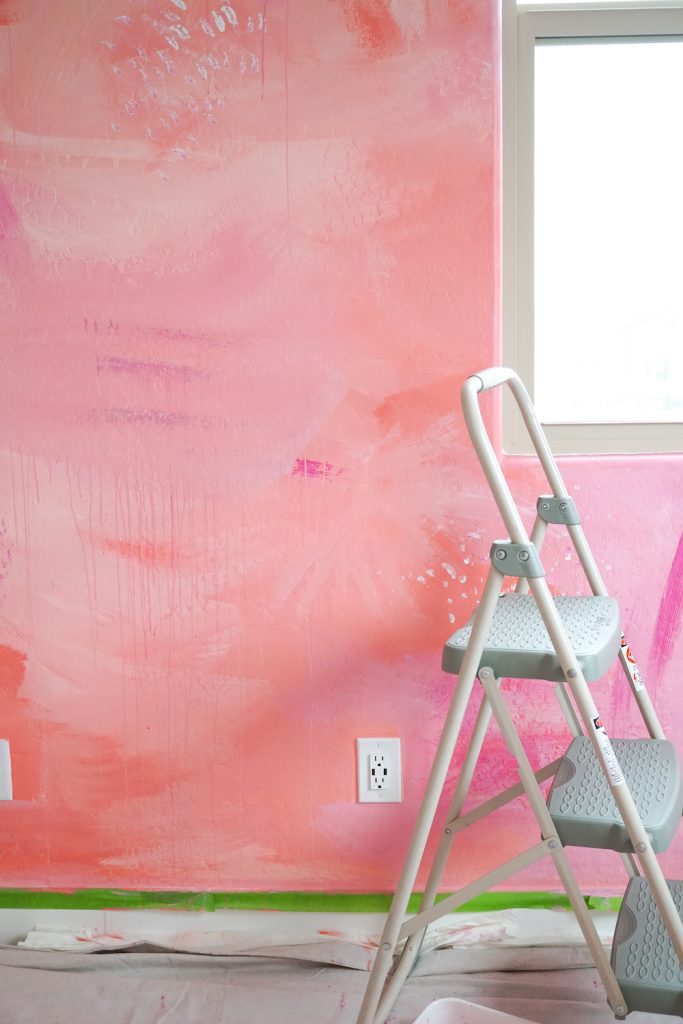
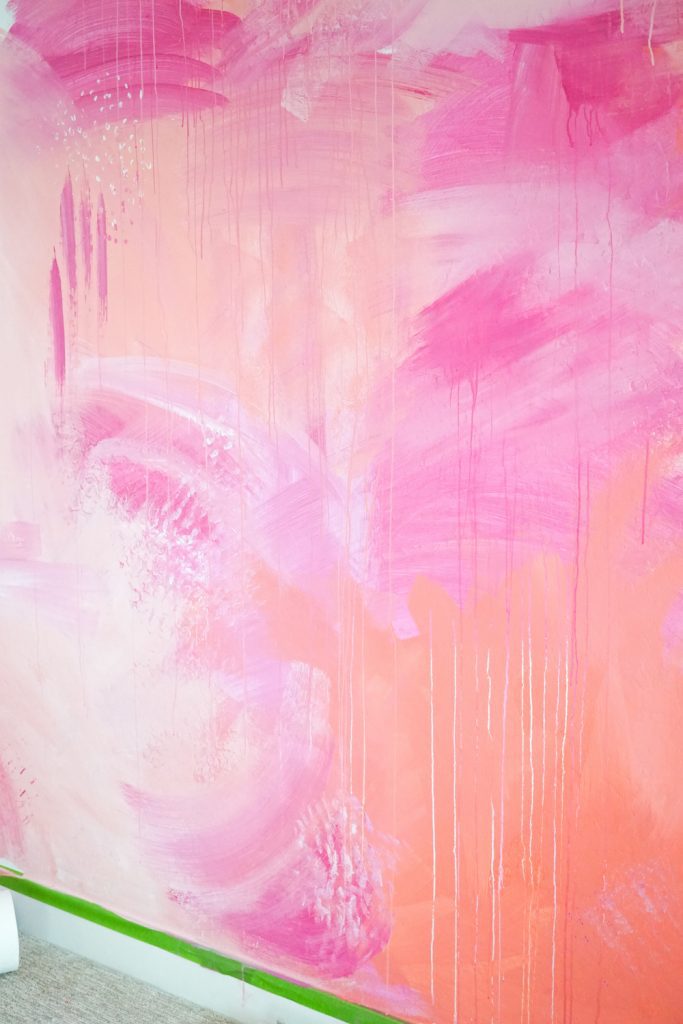
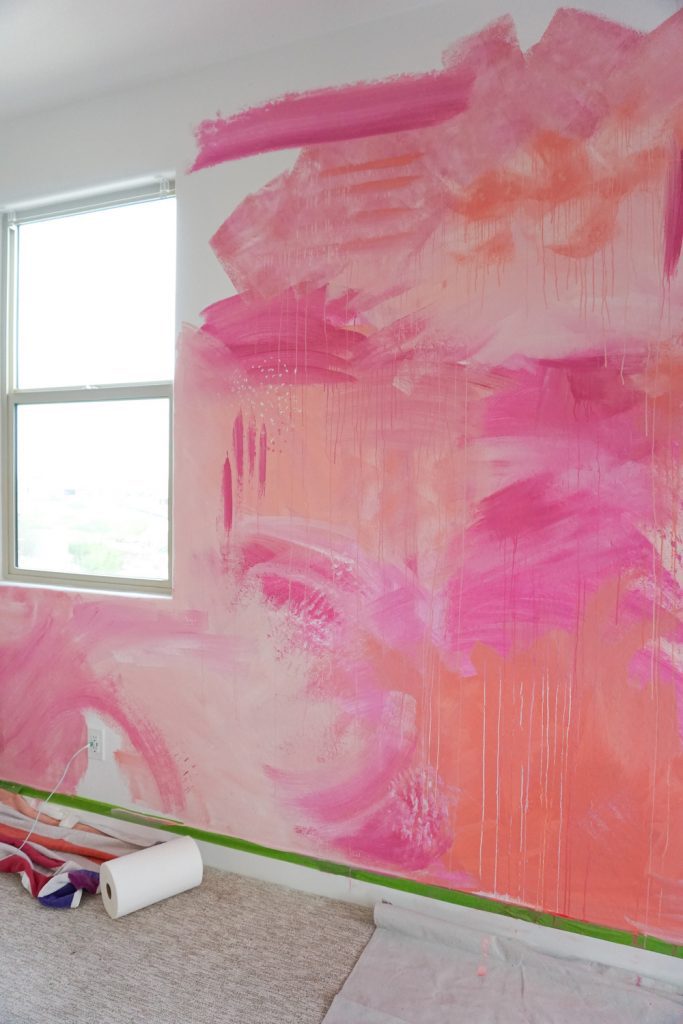
So the plan for the wall was to create a giant abstract piece of art painted right onto the wall to make it a focal point behind the bed. We opted for some unconventional items to paint with to create various texture and brush strokes. We also used Frog Tape and Wooster Chinex brushes (BEST BRUSH EVERRRR) for cutting in and then items such as such as a deck brush, micro fiber duster, and sponges to create interest.
The Process | Color Blocking Sections
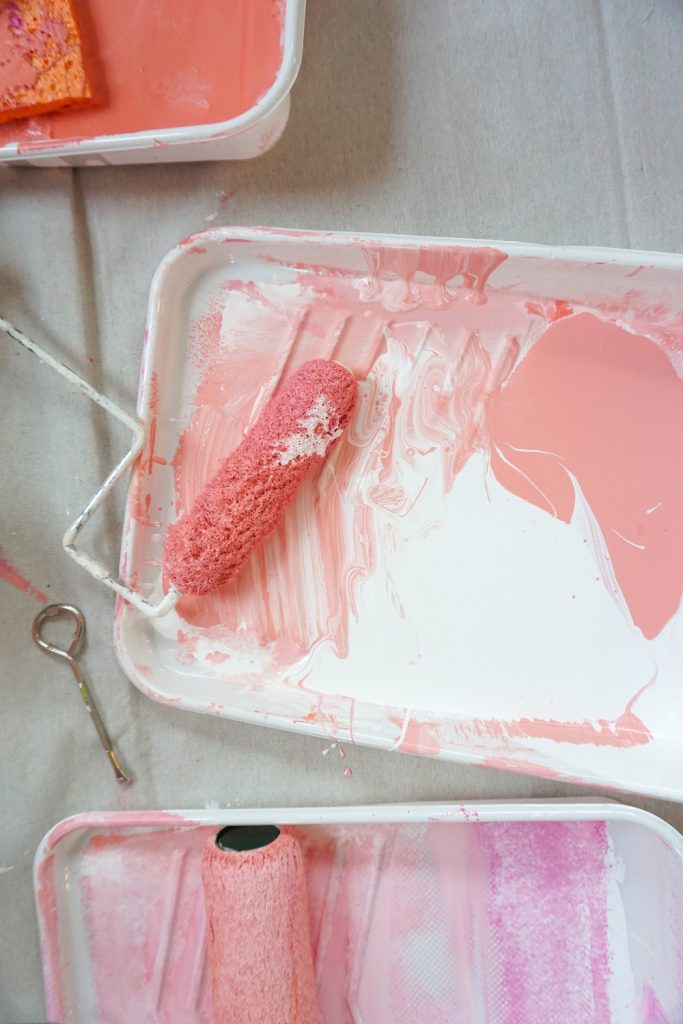
We started painting in a lower section and mixed white paint and water into it to create a marbling effect when rolling the paint on the wall. The water helped to blend the paint into different sections. We basically took small sections and color blocked them making sure to blend the sections together. When the paint was still wet, we used a spray bottle with water to spray the surface of the paint to create drips that would then drip down on each other. Using the unconventional paint tools we layered other colors to create depth and visual texture. It was also cool to take a roller that had been used in a different color and re-use it in another section with a different color paint. Not rinsing out the rollers and brushes added even more color depth which was a really fun unexpected element.
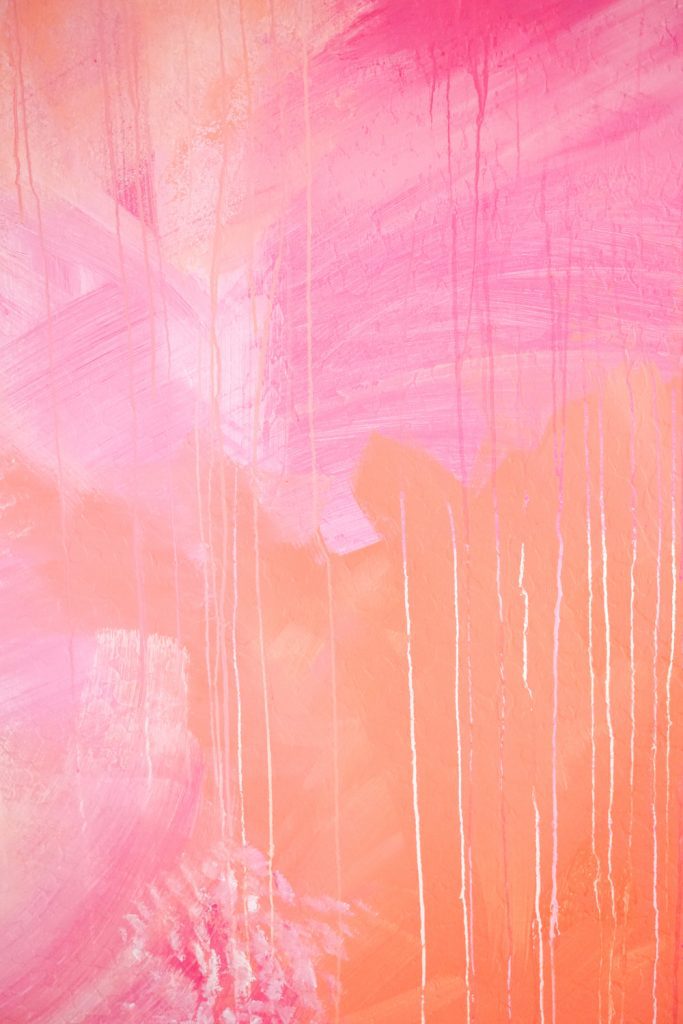
The way the PPG paint laid on the wall was soooooo good and the coverage was one coat worthy…such a quality product!
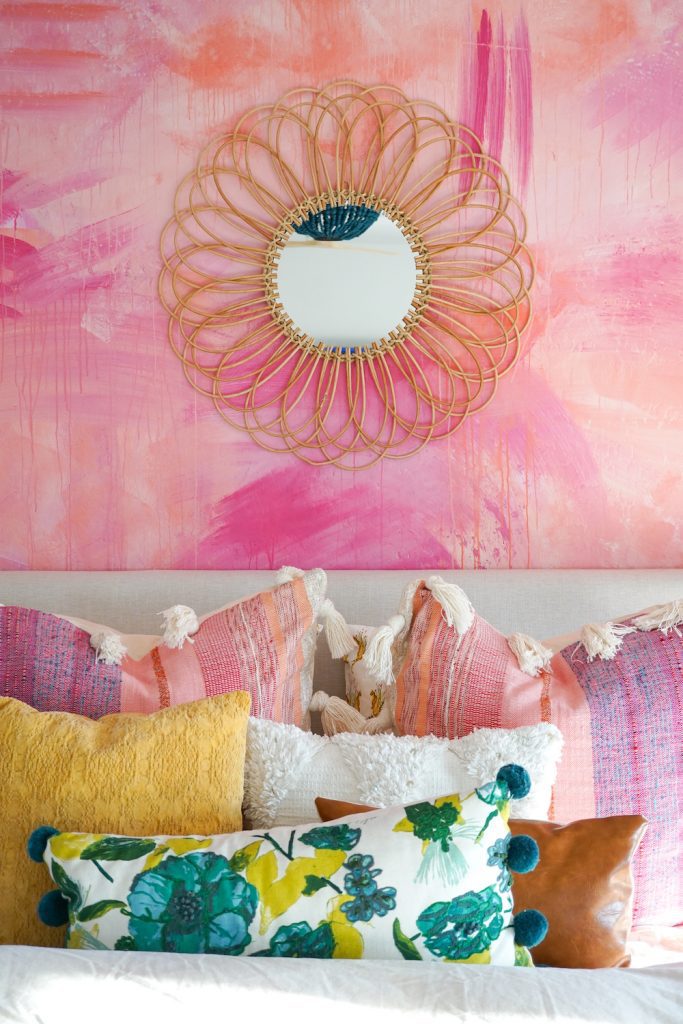
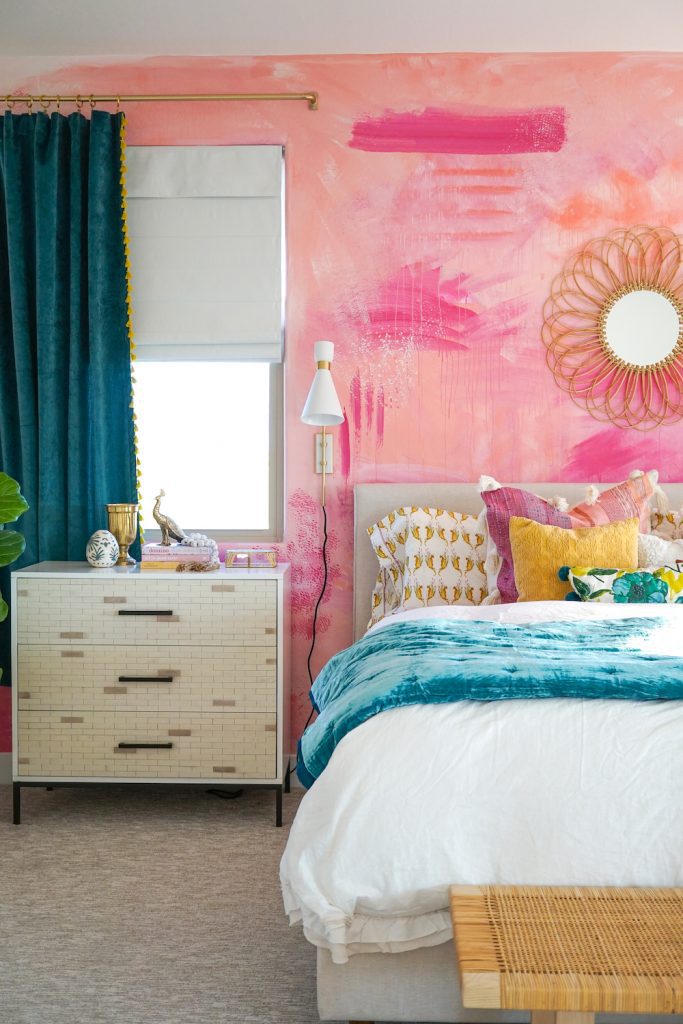
We found that in doing this technique, it is really just a bunch of trial and some the errors make the happiest mistakes. The best part is that if you don’t like a particular section, you can just paint over it. Here is a peek as we pulled the room back together. We knew we need to ground the space so we brought the deep teal color back into the bedding and window treatments.
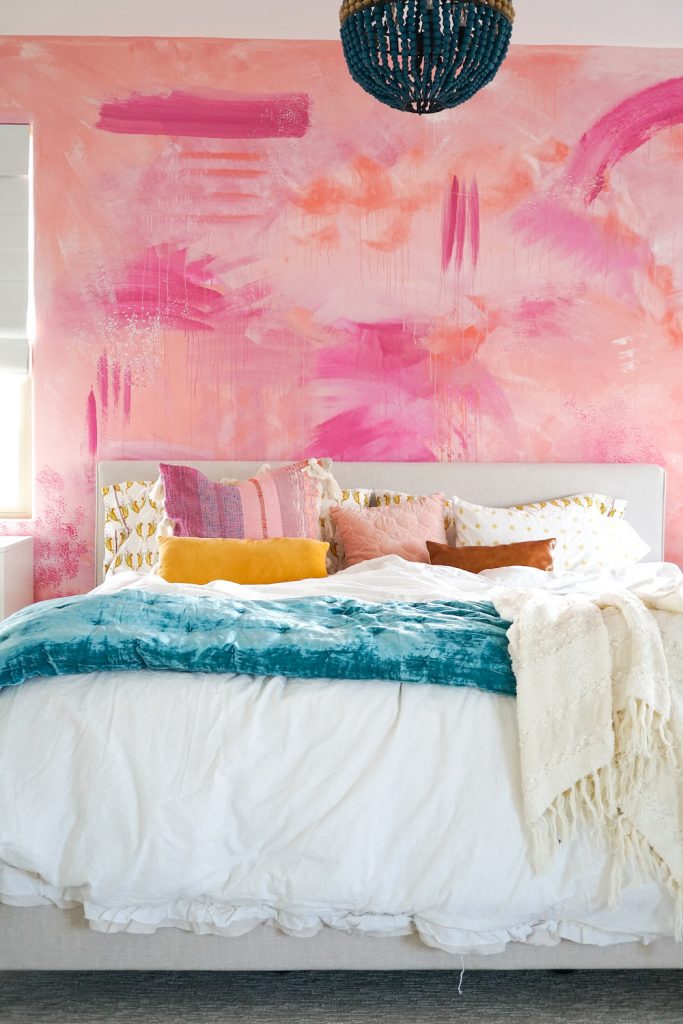
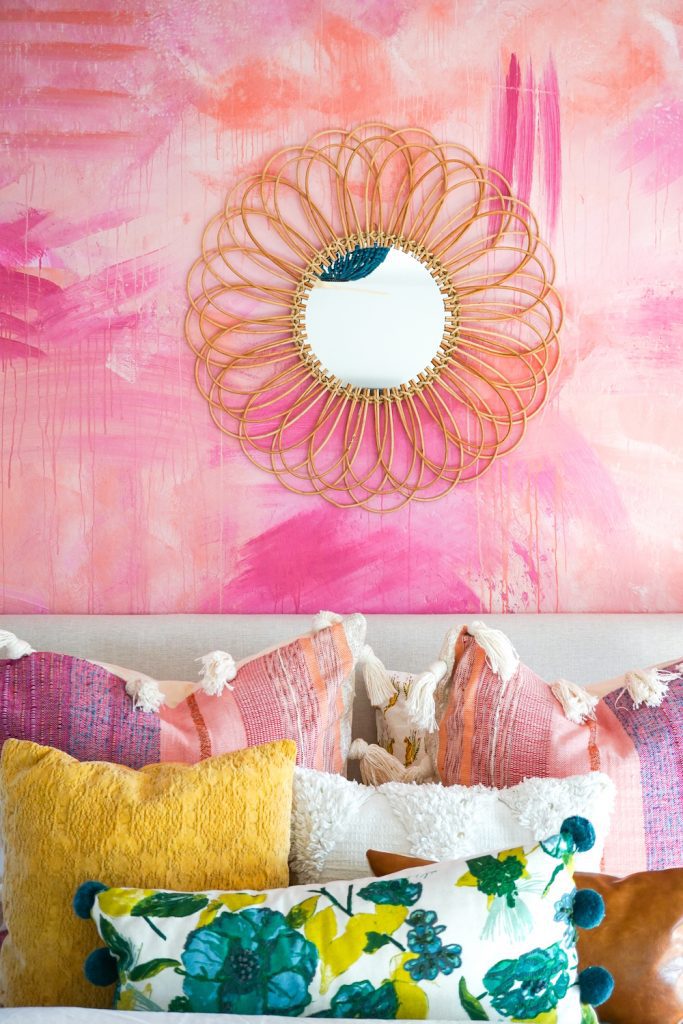
We also added a mirror above the bed, two wall sconces and some accessories to the nightstands. Here is wha the completed room looks like. We are in LOVE!
The Reveal | Completed DIY Focal Wall
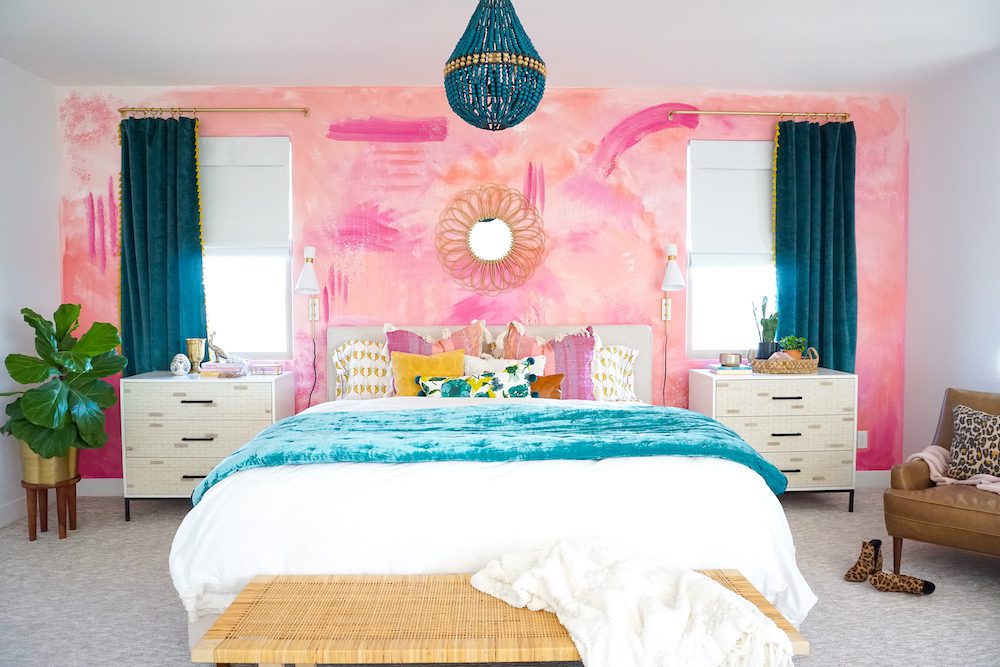


We love the way we were able to create a high impact, color filled focal wall on a budget by simply using paint. This project was completed in an afternoon and is an easy DIY to tackle for any skill level. Check out the full tutorial on our youtube channel, For the Love of Color.

Emily says
I love how the mural and the whole room came together! Could you share where the sconces came from?
Thanks!
Linda says
This looks so amazing! Inspiring! I am planning on an abstract wall project like this for my LIVING ROOM!!! AHH! Love your colors and final photo!
Ellie says
I clicked the link for the full tutorial and I can’t find it. Can you help?
Rebecca says
here you go https://youtu.be/3utjw2PaZ5E